My Complete Remote Vibe Coding Setup for Busy Parents
Disclaimer: This content reflects my personal opinions, not those of any organizations I am or have been affiliated with. Code samples are provided for illustration purposes only, use with caution and test thoroughly before deployment.
As a busy parent, I often only have 5-10 minutes of uninterrupted work time before my child needs attention. Traditional coding workflows—where you need a laptop open, an IDE running with AI agents actively working, and constant supervision—simply don’t work for someone in my situation. I needed a setup that could run in the background without any intervention, could be accessed from any device including my phone or tablet, and would let me make meaningful progress in short bursts throughout the day. Here’s the complete remote vibe coding workflow I’ve built using GitHub Copilot and Cloudflare Pages.
My Requirements
Before diving into the setup, let me outline what I was looking for:
- Works in short bursts: I only have 5-10 minutes at a time before being interrupted
- Runs in the background: No need to keep my computer running
- Web-based interface: I can check progress from my phone or tablet
- Full agent capabilities: The same agentic workflow I get with local tools like Cline or GitHub Copilot in VS Code
- Issue-PR-review based workflow: Everything happens through GitHub’s native interface
- No local server required: I don’t want to run a test server just to check my work
The Solution: GitHub Copilot Coding Agent + Cloudflare Pages
The magic combination that makes this work is GitHub Copilot’s agent mode running on GitHub-managed compute, combined with Cloudflare Pages for automatic preview deployments.
I know some people prefer to run always-on servers at home for this purpose—a Mac mini with AI agents constantly running, or an SSH setup to connect to a home lab server with Claude running in tmux. I’ve seen impressive setups where developers have persistent connections to their home machines and can code from anywhere with full local power. But for me, these approaches require too much maintenance. I don’t want to worry about keeping a server running, managing network configurations, or dealing with the inevitable hardware issues that pop up. I wanted something truly hands-off that runs entirely in the cloud.
Getting GitHub Copilot Pro
I was fortunate to get GitHub Copilot Pro for free through my open source contributions. GitHub offers this benefit to maintainers of popular open source projects, which is a fantastic way to reward community contributors. If you’re actively contributing to open source, check if you qualify.
The Workflow
Here’s how my typical workflow looks:
-
Dump ideas into GitHub Issues: Whenever I have an idea or spot something that needs work, I create a GitHub issue. This can be done from my phone in under a minute.
-
Ask GitHub Copilot Agent to work on it: I assign the issue to Copilot or mention it in a comment, and the agent starts working. This happens entirely on GitHub’s infrastructure, not on my machine, which means I don’t need to have anything running locally.
-
Walk away: The agent works in the background. I can close my browser, put down my phone, or attend to my child. The agent continues working.
-
Review when I have time: When I have a few minutes, I check the PR that Copilot opened. I can do this from my phone’s browser.
-
Leave inline comments for fixes: If something needs adjustment, I leave a comment directly on the PR. The agent picks it up and makes the changes.
-
Preview the changes: Thanks to Cloudflare Pages, every PR gets a preview deployment. For web apps like this blog, I can see exactly how the changes look in production without running anything locally. This is particularly valuable because you don’t need to spin up a local development server just to verify that a CSS change looks right or that a new page renders correctly.
Why This Works Better Than Local Development
The issue-PR-review workflow has some advantages over local development:
Inline comments are more natural: When I’m in VS Code, asking Copilot to fix something specific requires switching context, opening the chat panel, and explaining both the location and the issue in detail. With PR comments, I just click on the exact line and type my feedback—it’s the same workflow I’d use for human code review, which makes it feel much more intuitive. I know that Google’s AI coding tools also support leaving inline comments, but since I already have GitHub Copilot Pro for free through my open source contributions, I prefer to stick with the GitHub ecosystem.
Long-running tasks don’t block my machine: Complex refactoring or tasks that require the agent to think and iterate can take 10-20 minutes or even longer for substantial changes. With local development, my laptop would be occupied the entire time, fans spinning and battery draining. With this remote setup, I don’t even need my laptop powered on—the agent runs on GitHub’s infrastructure and I can check back whenever I have a moment.
Development environment setup is handled for you: Another advantage I’ve come to appreciate is that when you’re away from home or using a different device, the AI agent sets up the entire development environment on the cloud for you. There’s no need to clone the repository, install dependencies, or configure anything locally. The agent has access to everything it needs in its cloud environment, which means you can truly work from any device with a web browser.
Perfect for mobile: Reviewing a PR diff on my phone is actually pleasant. The GitHub mobile web interface is well-optimized for this. Trying to code on a phone would be miserable.
Setting Up Cloudflare Pages
Cloudflare Pages is the secret ingredient that makes this workflow complete. For web-based projects, you want to see a live preview of each PR branch so you don’t have to open your computer and run a local dev server just to check the work. Here’s how to set it up:
Initial Setup
-
Sign up for Cloudflare: Create a free Cloudflare account if you don’t have one.
-
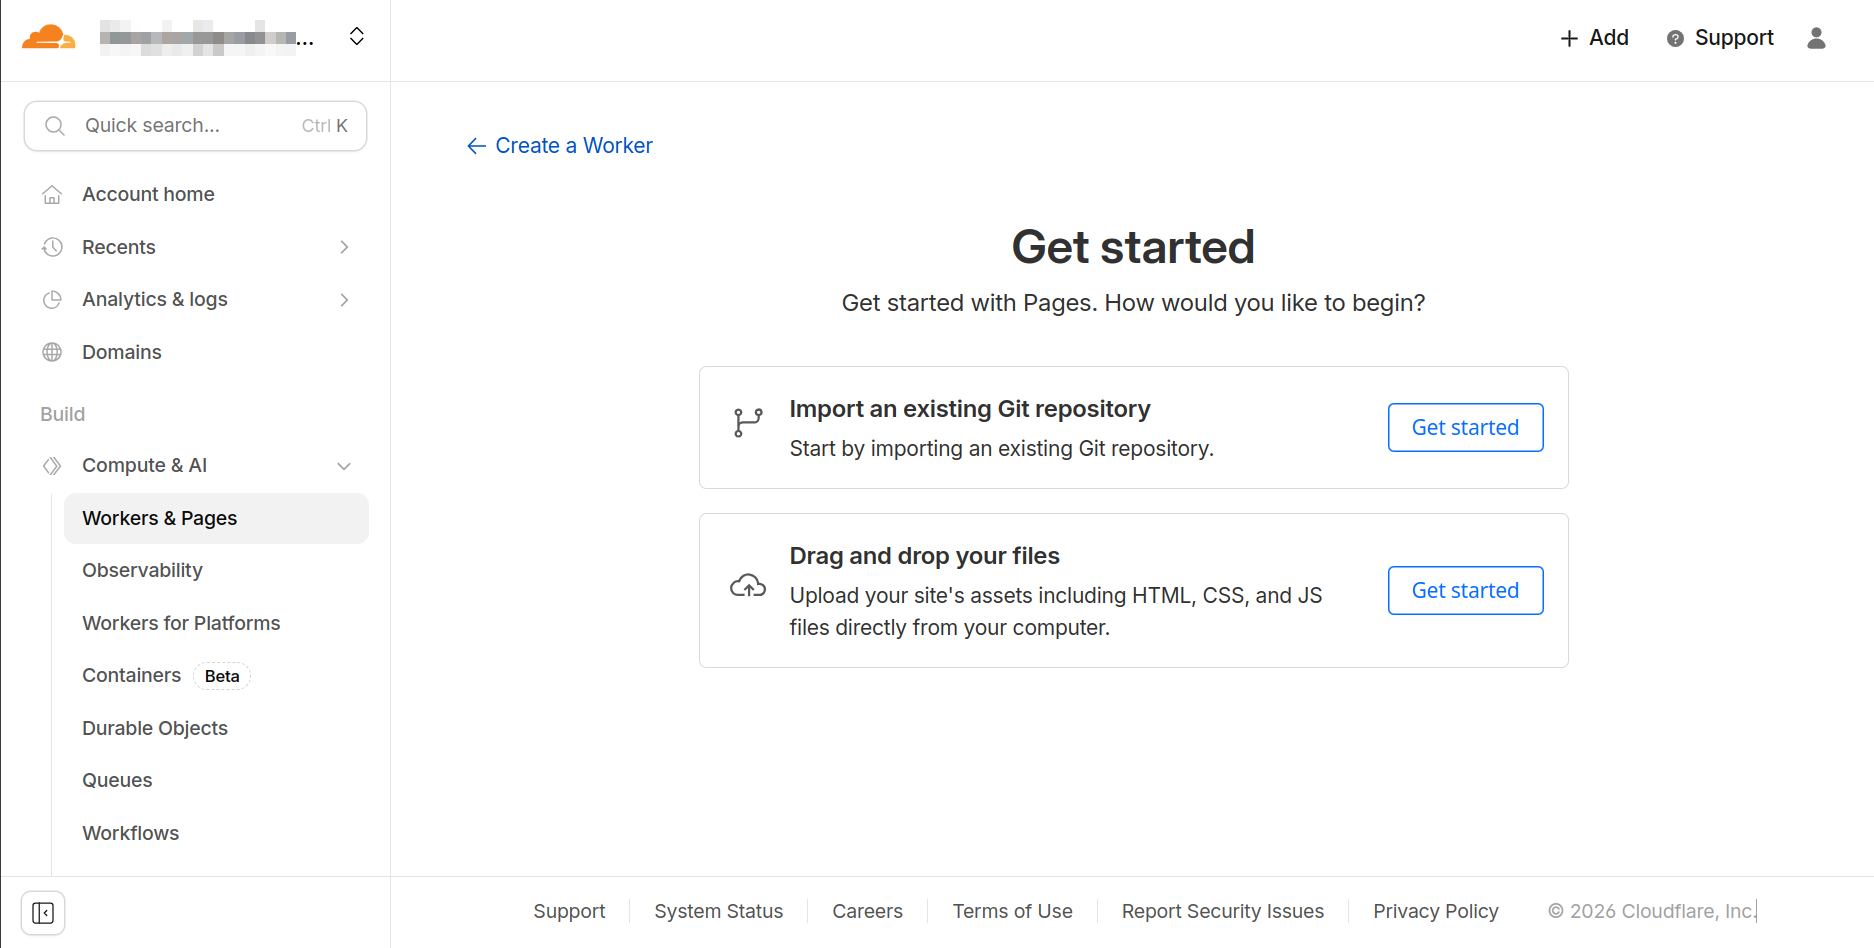
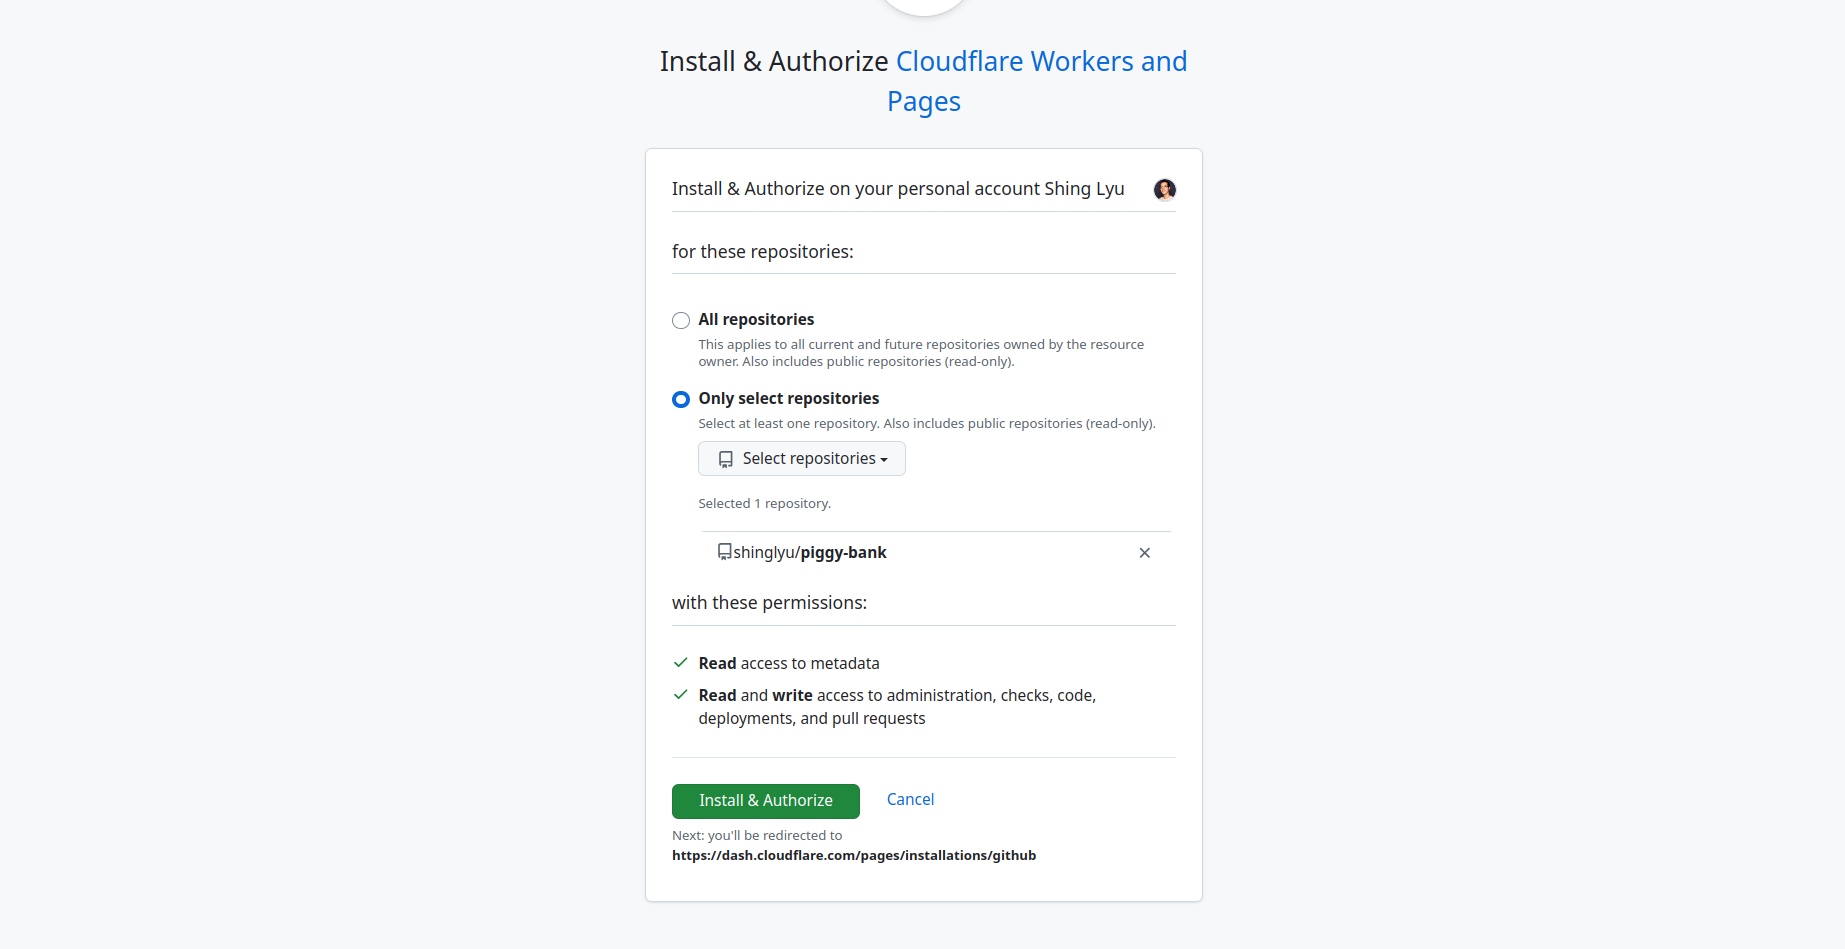
Link your GitHub account: Go to Pages and connect your GitHub account. Note that when you first navigate to the Cloudflare dashboard, the default view shows Workers, not Pages. Look for a message that says “Looking to deploy Pages? Get started” and click it to get to the Pages section.
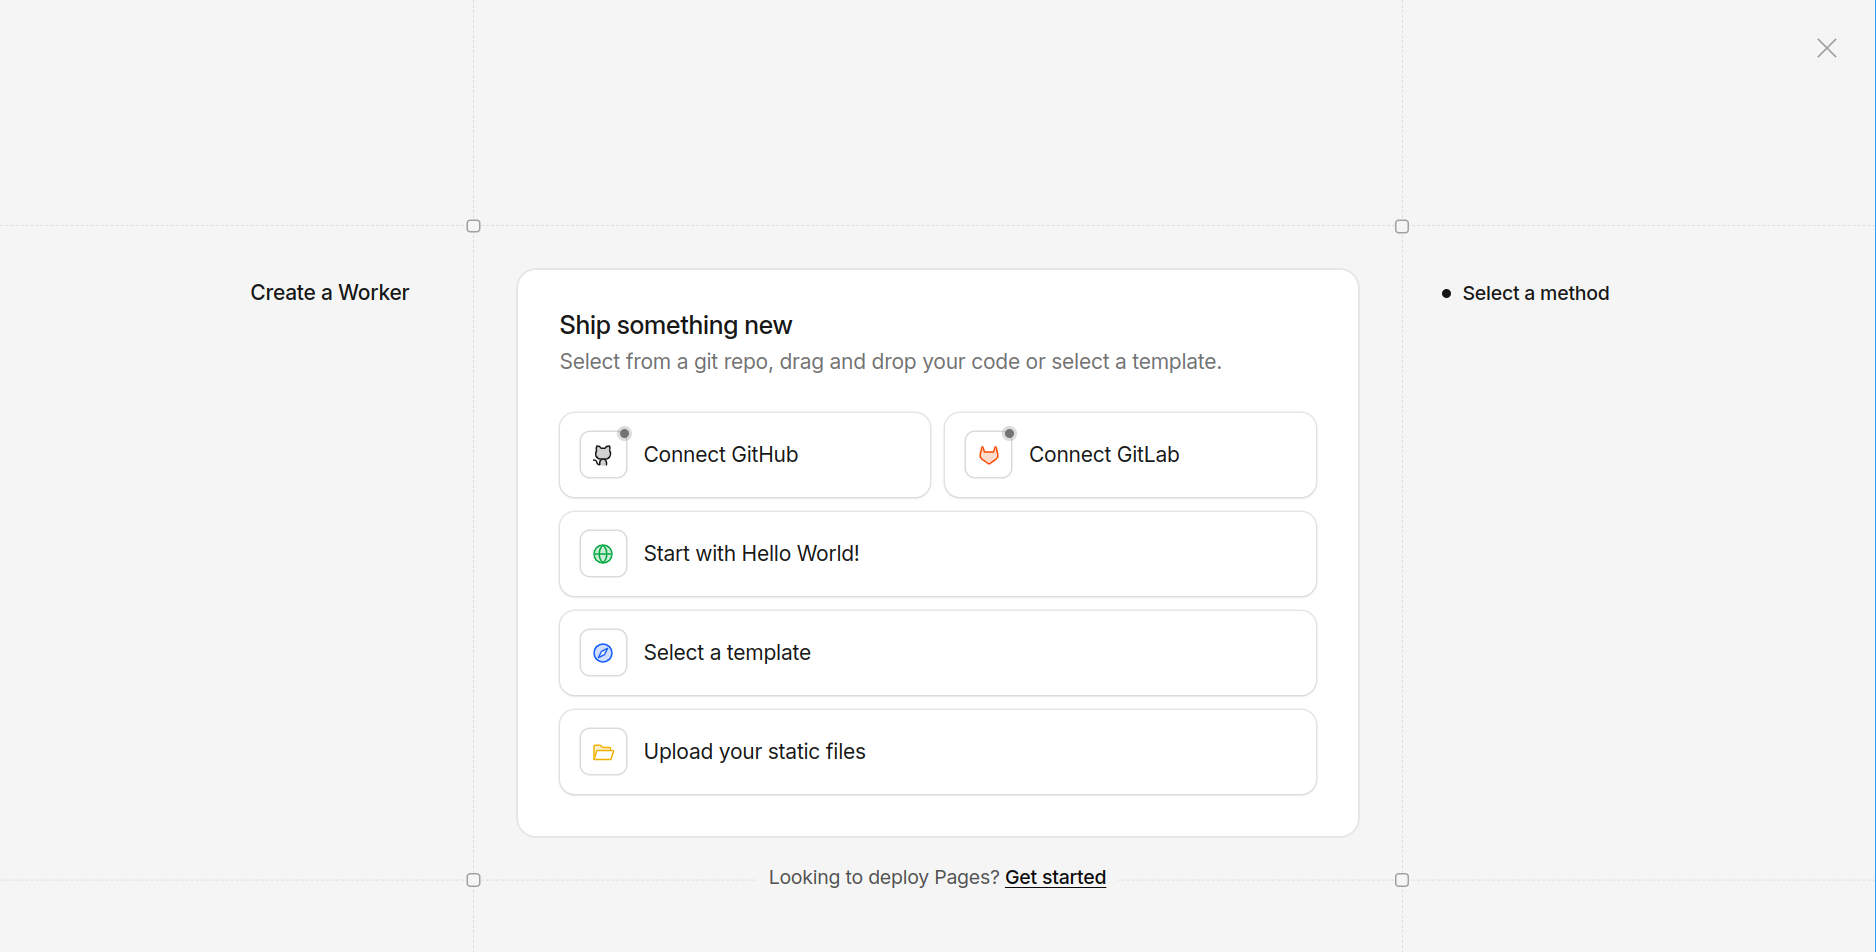
Then select “Import an existing Git repository > Get started”.
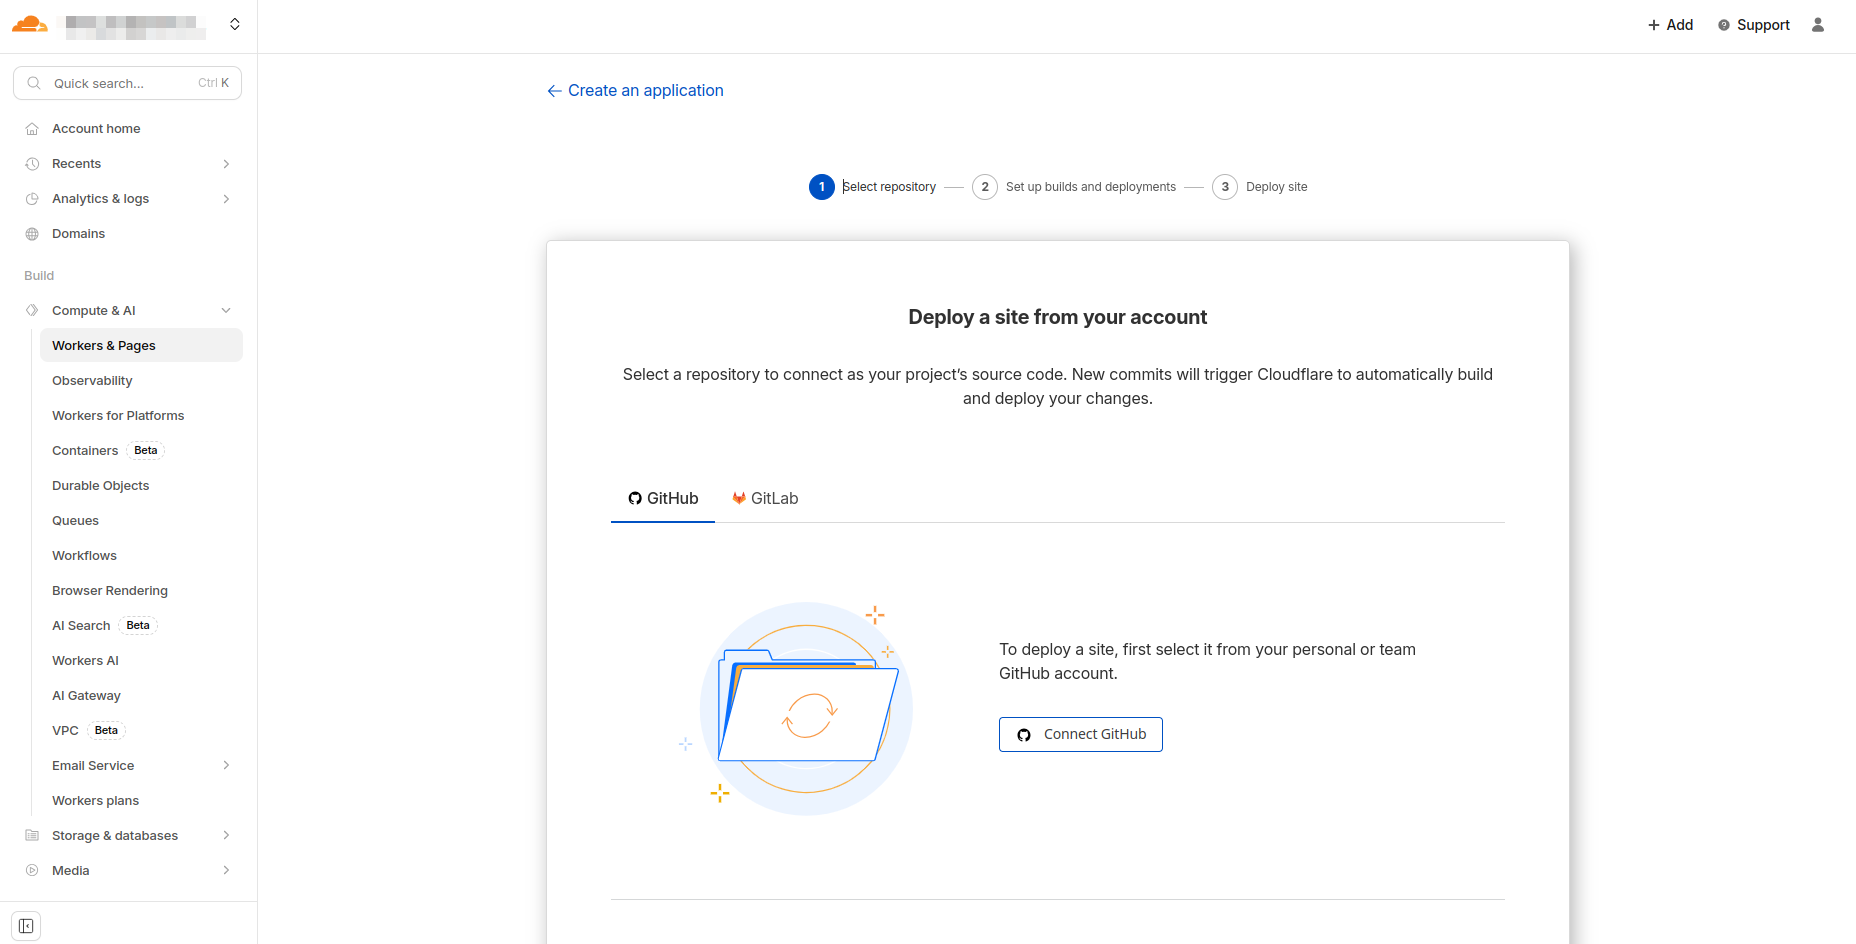
Be aware that syncing your repositories can take several minutes, and during this time the interface can behave a bit strangely. You might see the page repeatedly asking you to link your account even though you’ve already done so—this is just the sync process taking its time. Don’t keep unlinking and relinking your account; just give it a few minutes to finish synchronizing your repositories.
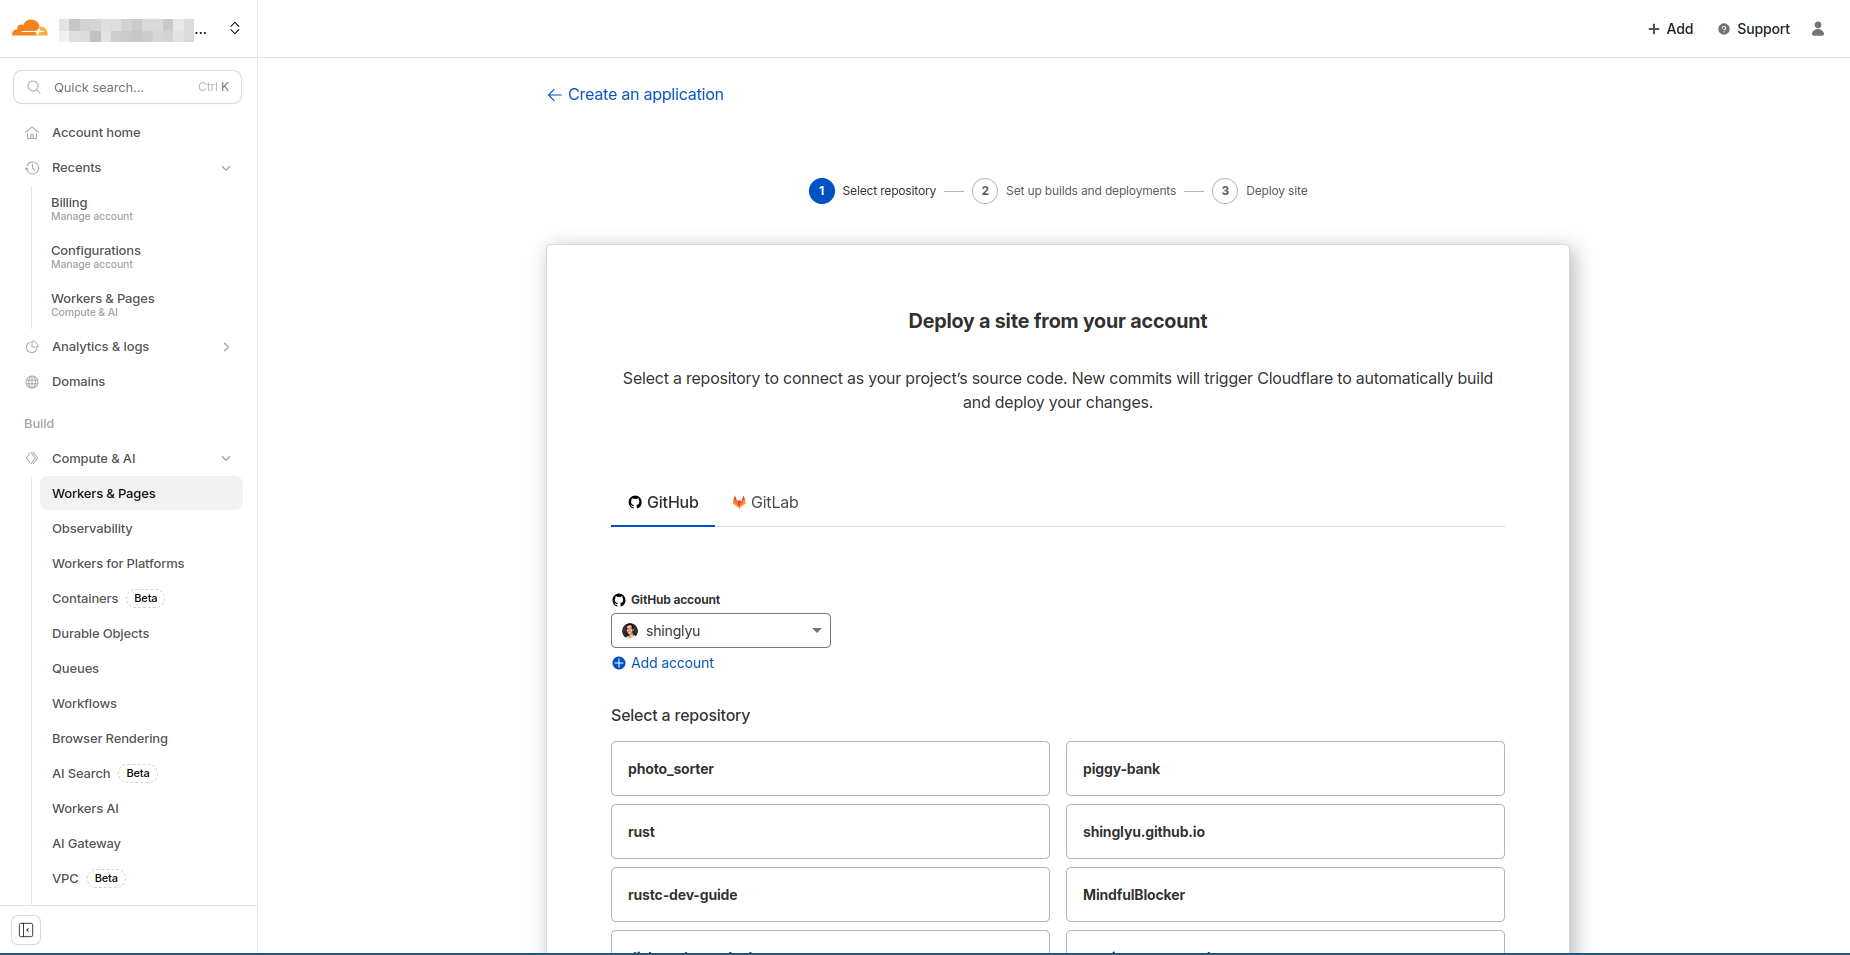
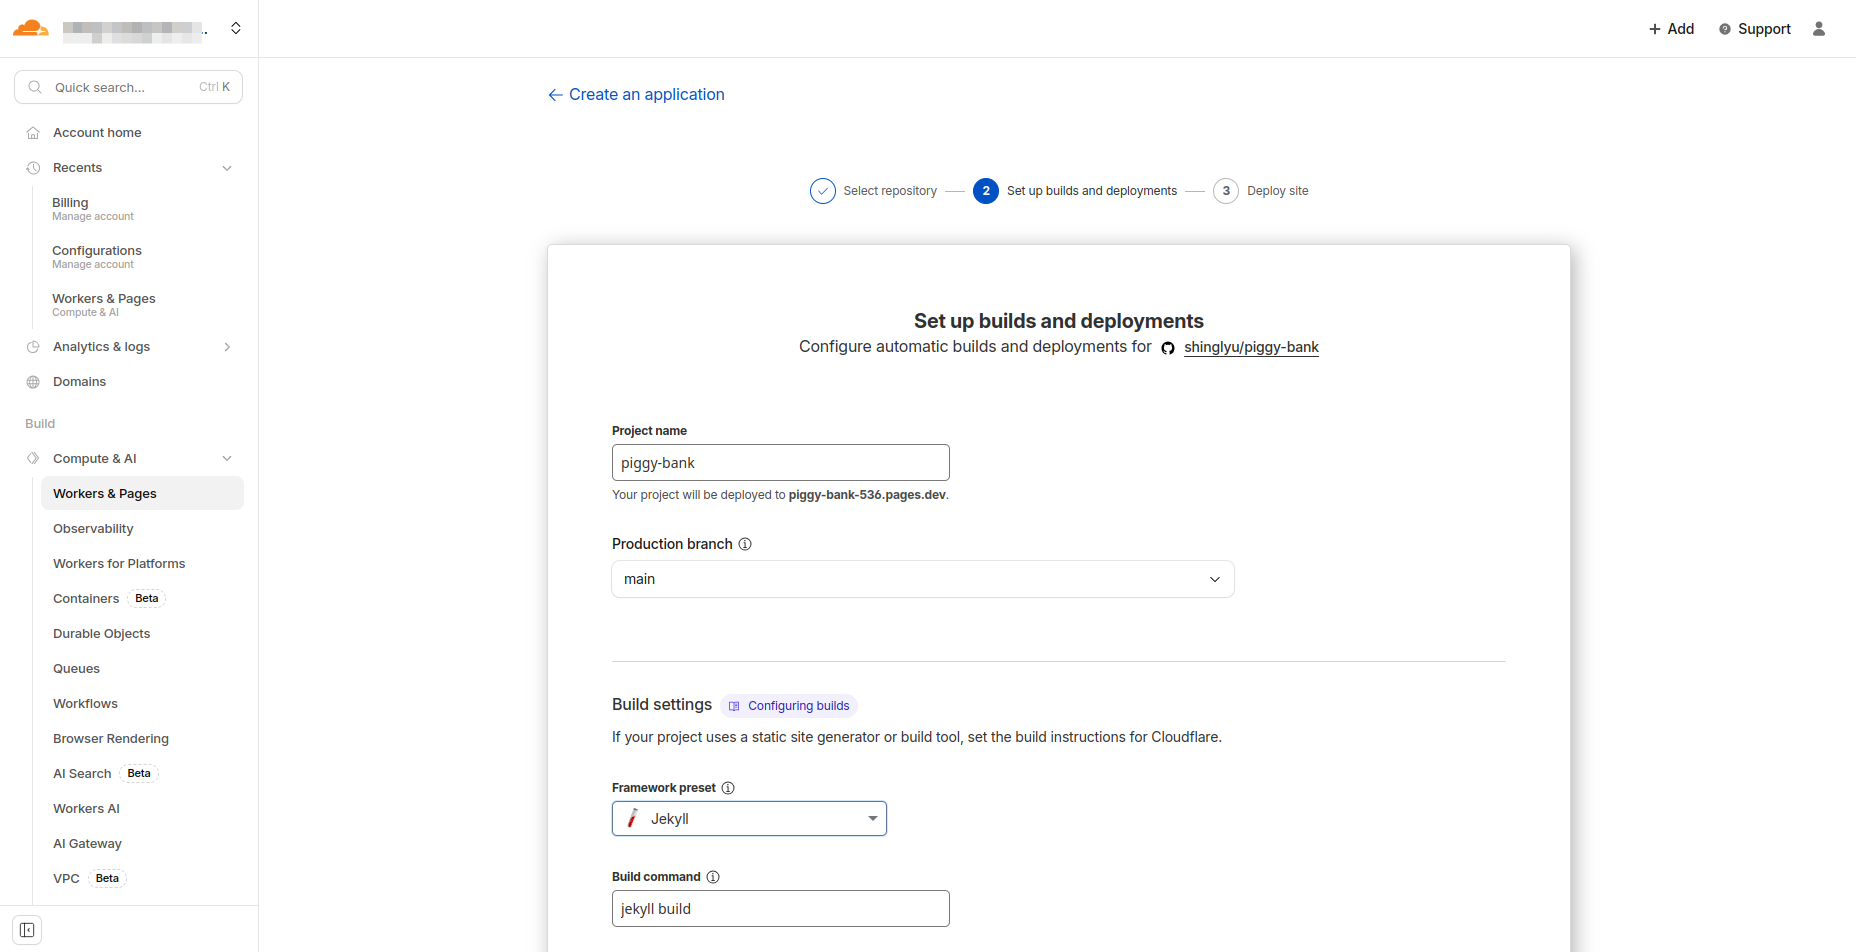
- Create a Pages project: Once your repositories are synced, select the repository you want to deploy and choose the appropriate framework preset. In my case, I selected Jekyll since that’s what powers this blog. Cloudflare will automatically detect the build settings, but you can customize them if needed.
Configuring Builds
Here’s the tricky part that took me a while to figure out:
Disable production branch deployments: In my case, my main branch is already deployed to GitHub Pages, so I don’t need Cloudflare to deploy the production branch at all—I only need Cloudflare Pages to build and deploy preview environments for my PR branches. The challenge is that Cloudflare doesn’t give you an option to disable production builds during project creation; it immediately starts building as soon as you create the project. You need to be quick—as soon as the project is created, navigate to the settings and cancel the initial build before it completes.
To disable production deployments, go to your project Settings > Builds & deployments > Configure Production deployments. Set the option to disable automatic deployments for your production branch. This way, Cloudflare will only build preview deployments for your non-production branches.
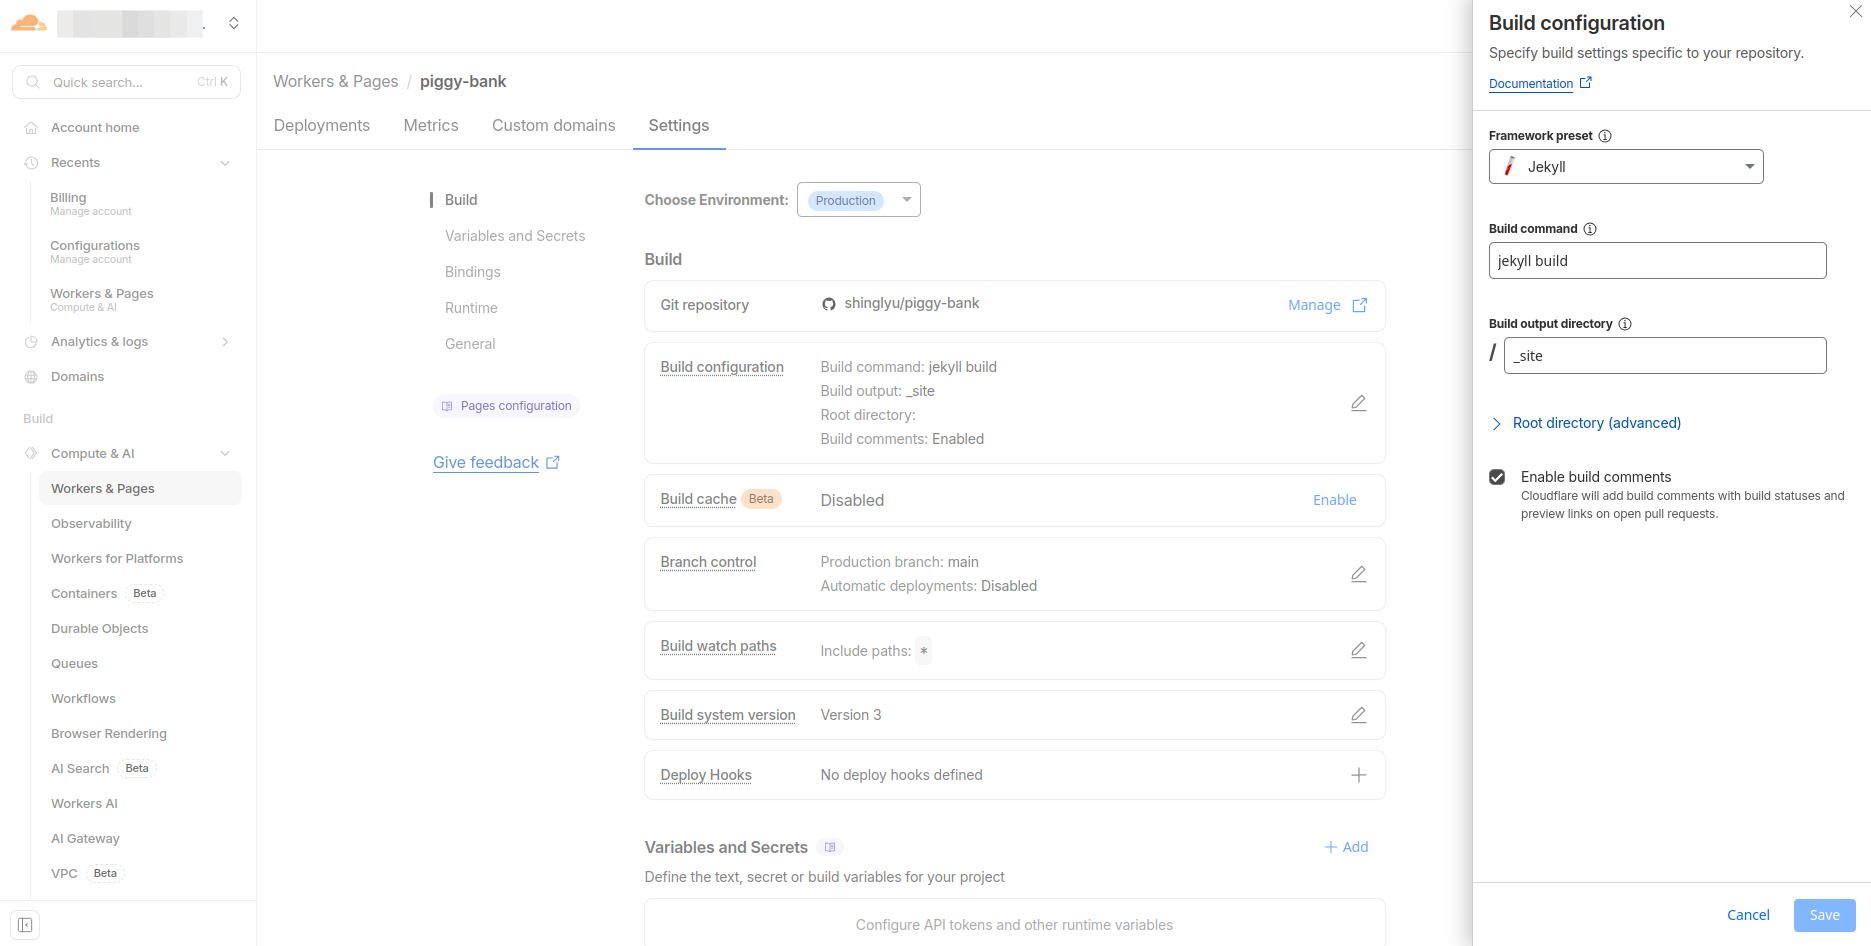
Enable preview deployments for all branches: This is where the magic happens. In the same settings area, configure preview deployments to be enabled for all non-production branches. Now, every time Copilot opens a PR, Cloudflare automatically builds and deploys a preview.

The Preview Comment
Once configured, Cloudflare will automatically comment on your PR with a preview URL. This means that when I check my phone to review Copilot’s work, I can click straight through to see the live preview—no need to clone the repository, install dependencies, or run a local dev server. It’s a remarkably smooth experience that makes reviewing changes from any device a breeze. You can see an example of this in action on this PR.
You can also use the “Access policy” setting in Cloudflare Pages to add authentication using Cloudflare Zero Trust, so only you or trusted users can access the preview pages via a one-time PIN or SSO. This is useful if you want to keep your preview deployments private while still being able to access them from any device.
Tips for Making This Work
Write Good Issues
The quality of Copilot’s output depends heavily on how well you describe the task. Take the extra minute to write a clear issue with context and specific requirements—bullet points work particularly well for breaking down what you’re looking for. The more precise your description, the less back-and-forth you’ll need in PR comments. That said, if you’re short on time, don’t let perfect be the enemy of good—having Copilot working on something imperfect is more efficient than having it wait while you craft the perfect issue. Just say something and iterate.
Use Text-to-Speech for Quick Issue Creation
When you’re on the go and don’t have time to type out a detailed issue, using a text-to-speech tool can be a lifesaver. I use OpenAI’s Whisper model to quickly dictate my thoughts, which helps me capture ideas the moment they occur without needing to stop and type. This makes it much easier to dump ideas into GitHub Issues while walking, driving, or doing other activities.
Write Instructions and Sub-Agents First
One approach I’ve found valuable is to write custom instructions and sub-agent configurations locally first. These typically live in a .github/instructions/ directory as markdown files that describe how the agent should handle specific tasks—things like coding style preferences, testing requirements, or domain-specific knowledge. I test these in VS Code with GitHub Copilot to make sure they work the way I expect, then commit them to the repository. This way, when the cloud-based agent picks up an issue, it already has well-tested instructions to follow. You can iterate on the instructions locally where the feedback loop is faster, and then the remote workflow benefits from those refined prompts.
Trust but Verify
The preview deployment is your verification step. Don’t merge without checking the preview, especially for visual changes—it only takes a few seconds to click the preview link and confirm everything looks right.
Iterate with Comments
Don’t try to get everything perfect in the initial issue. It’s often faster to let Copilot make a first attempt, then refine with PR comments. This is exactly how you’d work with a human contributor, and it tends to converge on a good result faster than trying to specify everything upfront.
Conclusion
This setup has genuinely transformed how I work on side projects. Instead of needing dedicated blocks of time at my computer, I can make progress in tiny increments throughout the day—a few minutes here, a quick review there. The combination of GitHub Copilot’s agent mode running on cloud infrastructure and Cloudflare Pages preview deployments creates a workflow that’s mobile-first and parent-friendly in a way that traditional development simply isn’t.
If you’re in a similar situation—short on time, frequently interrupted, but still wanting to build things—I highly recommend giving this setup a try. The initial configuration takes about 30 minutes, and after that, you can effectively code from anywhere with just a phone and an internet connection. It’s not the same as sitting down for a focused coding session, but for many tasks it’s more than enough to make steady progress on projects that would otherwise stall indefinitely.
What’s your approach to coding with limited time? I’d love to hear about other workflows that work for busy developers.