[Ubuntu教學]消失的解析度
Disclaimer: This content reflects my personal opinions, not those of any organizations I am or have been affiliated with. Code samples are provided for illustration purposes only, use with caution and test thoroughly before deployment.
This was an early technical blog I’ve written on another blogging platform. The content is probably outdated and my writing style was cringey. But I copied it here anyway for archival purposes.
哈這是我的開站文
本來預計第一篇要寫R61-AB3的開箱文的
不過因為買的那天剛好是搬家到宿舍的日子
手忙腳亂就沒辦法拍了…… 沒
關係改天再補上評測文好了
==========以上是廢話連篇==========
相信不少人有這個經驗
剛灌Ubuntu 8.04的時候
解析度最高只能到800x600(或更低)
系統»偏好設定»螢幕解析度 裏面只能看到800x600
其實問題很簡單
就是因為Ubuntu偵測不到你用的螢幕
可是手動選擇螢幕的程式又不知道為什麼被隱藏了
解決方法很容易
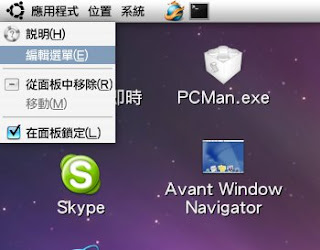
1.在工具列上按右鍵»編輯選單
2.把”螢幕與顯示卡”勾起來
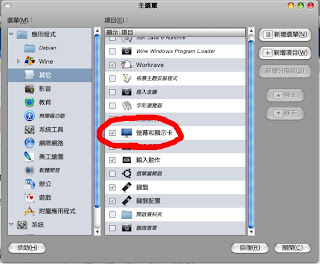
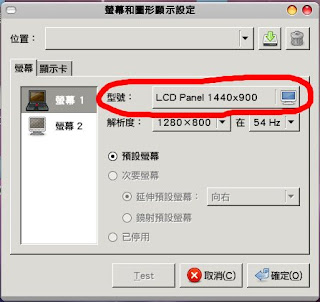
3.再到 應用程式»其他»螢幕與顯示卡 再”型號”那邊選擇適合自己螢幕解析度的型號就可以了
接下來你就會看到隱藏的解析度通通都現身啦!
p.s某些特殊的解析度,例如像我的R61解析度是1440x900
雖然型號選得是1440x900 但是選項裡只有1280x960之類的
這些需要增加特別解析度的我下一篇會寫。
原文發表於 2008年9月5日