How to Unit Test WebExtensions
Disclaimer: This content reflects my personal opinions, not those of any organizations I am or have been affiliated with. Code samples are provided for illustration purposes only, use with caution and test thoroughly before deployment.
We all know that unit-testing is a good software engineering practice, but sometimes the hassle of setting up the testing environment will keep us from doing it in the first place. After Firefox 57, WebExtension has become the new standard for writing add-ons for Firefox. How do you set up everything to start testing your WebExtension-based add-ons?
In the earlier format of the Firefox add-ons, namely the Add-on SDK (a.k.a. Jetpack), there is a built-in command for unit-test (jpm test). But for WebExtension, as far as I know, doesn’t have such thing built in. Luckily all the technology used in WebExtension is still standard web technology, so we can use off-the-shelf JavaScript unit-testing frameworks.
I want to keep my tests as simple as possible, so I made some assumptions:
- I don’t test WebExtension API calls. I keep a thin layer of wrapper around WebExtension API calls, and I don’t put too much logic into them. So hopefully the risk is low enough to not test. Anything more complex like the business logic or custom data structures or functions are all tested.
- I don’t like to use non-standard module systems. As far as I know WebExtension doesn’t support ES6 module yet. So I follow the good old way of including all the JavaScript I need in the page (or as a background page).
- I don’t use Node.js libraries in add-ons, period.
Mocha and expect.js
We will be using Mocha test framework and expect.js assertion library, but you can use any test framework that supports running in browsers. We’ll be using the browser version of Mocha. You need to create an HTML file like this:
<html>
  <head>
    <meta charset="utf-8">
    <title>Unit Tests (by Mocha)</title>
    <link href="https://cdn.rawgit.com/mochajs/mocha/2.2.5/mocha.css" rel="stylesheet" />
  </head>
  <body>
    <div id="mocha"></div>

    <script src="https://cdn.rawgit.com/Automattic/expect.js/0.3.1/index.js"></script>
    <script src="https://cdn.rawgit.com/mochajs/mocha/2.2.5/mocha.js"></script>

    <script>mocha.setup('bdd')</script>

    <script src="calculator.js"></script>
    <script src="test.calculator.js"></script>

    <script>
      mocha.checkLeaks();
      mocha.run();
    </script>
  </body>
</html>
In the file you can see that we imported the Mocha library and expect.js library from CDN, so we don’t need to install anything locally. We’ll be testing a imaginary calculator library used in our extension. The test cases are written in the test.calculator.js file. The classes and functions under tested are placed in the calculator.js file. We load the module under test and the test case in the file as well
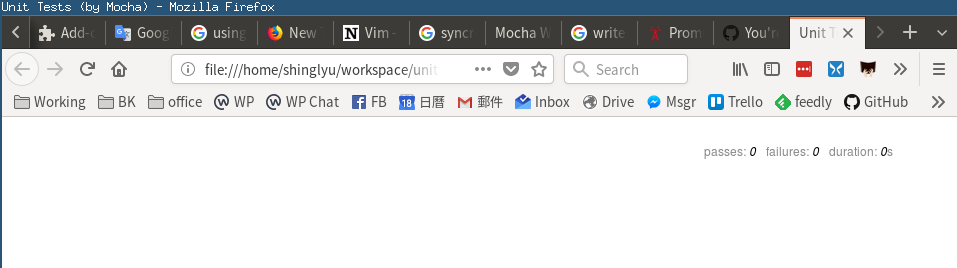
The way to run it is to simply open this file in a Firefox, if everything goes well you should see the following screen:
I usually put the main logic and code that interacts with extension APIs in a file named background.js. Any other business and utility functions goes into separate JS files, which are test using the above unit testing framework. They are all load together with background.js as background scripts. To do so, you need to add all of them to manifest.json like so:
{
  "name": "Calculator Add-on",
  ...
  "background": {
    "scripts": [
      "background.js",
      "calculator.js"
    ]
  },
  ...
}
Now we can write more tests like so in test.calculator.js:
describe('My calculator', function() {
  it('can add 1 and 1 and get 2', function() {
    var result = my_add(1, 1); // my_add is definied in calculator.js
    expect(result).to.eql(2);
  });
});
Run the page again, and you should see it failing, because you haven’t defined my_add yet.

Now, write your my_add in calculator.js:
function my_add(x, y) {
  return x + y;
}
Run the page once again, and your test now passes.

Testing asynchronous code
Many WebExtension APIs return promises so you can write functions that receives and returns promises so you can chain them. The problem is that if you have and error in the Promise chain, the error will be consumed by the promise, so the test framework will not catch it, resulting in an always-passing test. Let’s say you want to write a function that counts how many times you’ve visited Facebook, you can use the browser.hisotry.getVisits() API, which returns a promise. So first we write a test for the count_visits() function we are about to write.
describe('Facebook counter', function() {
   it('can count', function() {
     var mock_getVisits = new Promise(function(resolve, reject) {
       // Simulate the getVisits API that returns 3 results
       resolve([new Object(), new Object(), new Object()]);
     });

     mock_getVisits
       .then(count_visits)
       .then(function(count){
         expect(count).to.eql(3);
       });
  });
});
Then we implement the count_visits(), but we made a typo by writing length as legnht
function count_visits(history_items) {
  return history_items.legnht;
}
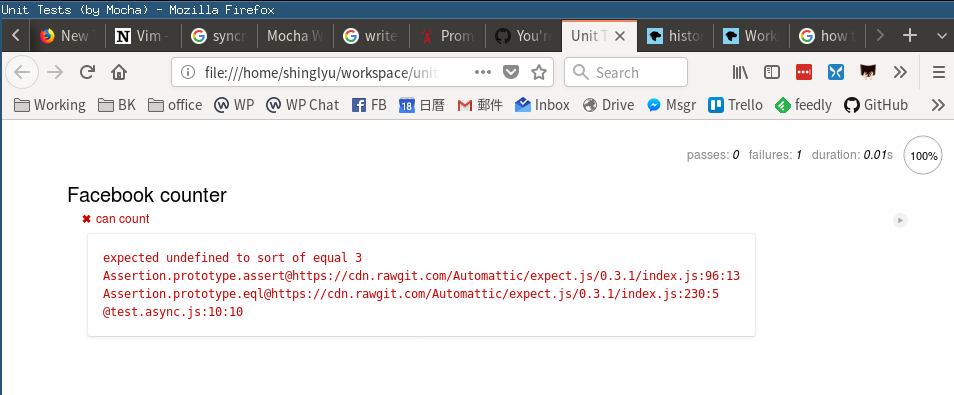
In this case, the function will always return undefined, because there is no such thing as legnht for arrays. But if you run the test, you’ll find the test still passing. If you open the developer, you’ll see the actual error. But seems the test framework didn’t catch it.

The latest Mocha library already have built in promise support, you only need to make sure you return the promise so the error can be captured.
describe('Facebook counter', function() {
   it('can count', function() {
     var mock_getVisits = function() {
       return new Promise(function(resolve, reject) {
         // Simulate the getVisits API that returns 3 results
         resolve([new Object(), new Object(), new Object()]);
       });
     };

//   vvvvvv Notice the "return" here
     return mock_getVisits()
       .then(count_visits)
       .then(function(count){
         expect(count).to.eql(3);
       });
  });
});
Now the test fails as expected:
Another way is to use async/await to make your async function looks sync. Mocha can easily handle that as usual synchronous functions.
describe('Facebook counter', function() {
// Notice the async here             vvvvv
   it('can count using async/await', async function() {
     var mock_getVisits = function() {
       return new Promise(function(resolve, reject) {
         // Simulate the getVisits API that returns 3 results
         resolve([new Object(), new Object(), new Object()]);
       });
     }

// and await here vvvvv
     var visits = await mock_getVisits();
     expect(count_visits(visits)).to.eql(3)
  });
});
Conclusion
Writing test WebExtension it’s not as hard as you might think. Simply copying and pasting the HTML and you’re ready to go. You don’t need to install anything or set up complex Node.js compiling pipeline. Start testing your WebExtension code now, it saved me many hours of debugging time, and I believe it will help you as well.